Getting Started with Creating YouTube Videos
I started adding videos to my YouTube channel in November 2018, this was mainly intended as an accompaniment to the blog post I did to Get your GraphCMS data into Gatsby.
A the time I was using a web cam I’d bought off of Amazon for around £17, the quality wasn’t great but it helped me get my point across.
I used my Transformer Pro with OBS then went on and uploaded it to YouTube and embedded the video into the blog post.
This isn’t a post on how to grow your audience, I’m still working on that myself! Although I will recommend the Developer’s Guide to Starting a YouTube Channel (affiliate link) a great book by James Q Quick on the subject, which has loads of great actionable content.
Why am I writing this?
I’m writing this because I was asked by a friend of mine (Rich Haines) his words “You should do a guide on getting started with YouTube vids.” he also said it’s something he’s considered but didn’t know where to start.
It’s something I’ve thought about but don’t really know the process.
Rich asked me to cover a few points, some of them I can give what I know, other areas are still a WIP for me.
These are the bullets, I’ll be digging into these a bit more but for simplicities sake I have literally copy pasted them from the conversation I had with Rich:
At this point in time I have got 80 videos on YouTube, I’m at the start pretty much.
Like with most of the content I write, I’m making this for people one or a couple of steps behind me but ultimately for future me.
Disclaimer
This is my opinionated guide, the tools and approaches I use may not work for you. My primary OS now for making content is Windows (powered by WSL) I used Linux in the past but the experience was a bit too rough around the edges to justify using it.
How to get started
In the words of Joel Hooks, JFDI, this is the same advice you will hear from a lot of YouTubers when someone asks “How to be a YouTuber?” they’ll say, start, iterate, get better.
In the words of MKBHD
You’ll never start off with a perfect first video.
What you also need to bear in mind is that MKBHD has also been consistently adding videos to YouTube since 2009.
Here’s some sage advice from Twitter motivator Danny Thompson.
Also from Rich himself when feeling particularly insightful.
They both covey the same message.
What do I need
As this is my opinionated guide I’ll be detailing what I use for the content I’m producing (mainly coding guides).
The basics you would need would be:
- a computer
- a mic
- screen capture software
Here’s my list of tools I use for recording videos, nothing that’s going to break the bank but not incredibly cheap either.
- Fifine USB Mic, at £24.99 when I purchased it in 2018, it’s now around £50.
- OBS: Free and open source.
- Aukey Webcam, at £45 there are other options of comparable quality I’ve got a couple sub £20 which were terrible.
- XSplit VCam, best bit of software I’ve paid for recently. I got a licence for a quarter (at £9.95) and will be getting a lifetime licence (at £49.99) when it’s time to renew.
- USB Lighting, this clips to the desk and adds a little additional lighting, at £9.09 it’ll do for now.
- Large Microphone Boom Arm, not essential but is can cut vibrations from the desk (when typing) if the mic is on the desk.
The sound will be the most important thing when people are watching your video so a decent mic will go a long way, I’m still really happy with the quality of my Fifine USB mic I got back in 2018.
For screen recording all I have ever used is OBS on Windows, Linux and macOS so I’m not able to recommend anything outside of that. Doing the standard “screen recording software” search brings up loads of options for free and paid software.
There is also Streamlabs OBS which has a lot of pre-made scenes and integration with YouTube and Twitch.
Streamlabs OBS is all together a much nice looking experience but I found it a bit tedious digging around for settings.
Streamlabs OBS is a fork of OBS so if there are any improvements in OBS they may take a while to be implemented in Streamlabs OBS.
How do I set it up
I’m going to presume this is “how do I set up the screen recording software?” so in my case this is “how do I set up OBS?”
When you first open OBS after downloading it you’re prompted to use the Auto-Configuration Wizard which will determine the best settings based on your hardware and internet speed.
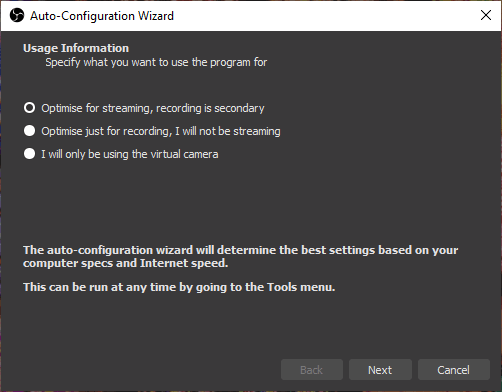
There are two options, if you’re not interested in streaming on Twitch then I’d suggest selecting the second option. The last option is for sharing your scenes with other software like Zoom.
Open Broadcaster Software (OBS) is a whole post in itself I think!
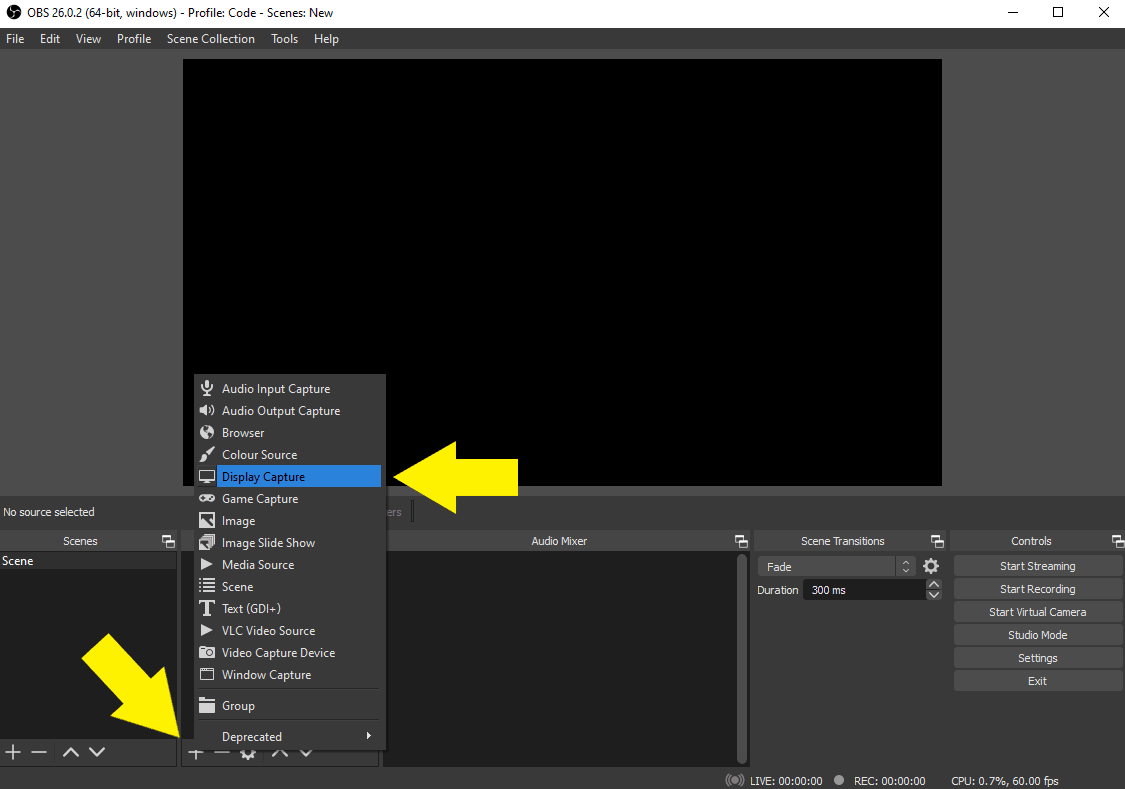
For the very basics you’re going to need a scene with a display capture.
The bottom left corner will show you the Scenes collection, this is where you can create differing appearances of how the screen appears when you make a recording.

You can right click on the Scene name and select Rename from the context menu to give it a more meaningful name if you wish.
First thing that will need to be added to the Scene is a display to record. In the Sources panel (next to Scenes) click the plus button and select Display Capture, the next dialogue will prompt you to select a screen to display in the scene.
Check the video here on setting up your first OBS Scene:
Scenes
Now that I’ve gone over the basics of a scene there’s a few I use for when I’m doing a screen recording, there’s a few more for streaming.
For doing a screencap for a guide which is going to be a pre-recorded YouTube video I’ll use a scene with my desktop input source and sometimes with a video capture device.
In this scenario I’ll rarely switch scenes and stick with the scene I start with.
If I’m streaming there’s a couple I’d use, first would be same if it were a pre-record with a desktop input source and a video capture device.
Be Right Back!
If you’re streaming and you’re not able to stay on the camera, like when that delivery you’ve been waiting on all day decides to turn up and knock on your door ten minutes into a stream!
This would be a good candidate for a Be Right Back Scene, this (for me) is an image I created in PowerPoint with BRB on there.
Countdown Timer
If you’re streaming and want to have a countdown timer, there’s a script you can use in OBS available for download in the OBS forum resources section which is pretty neat, download that for use later.
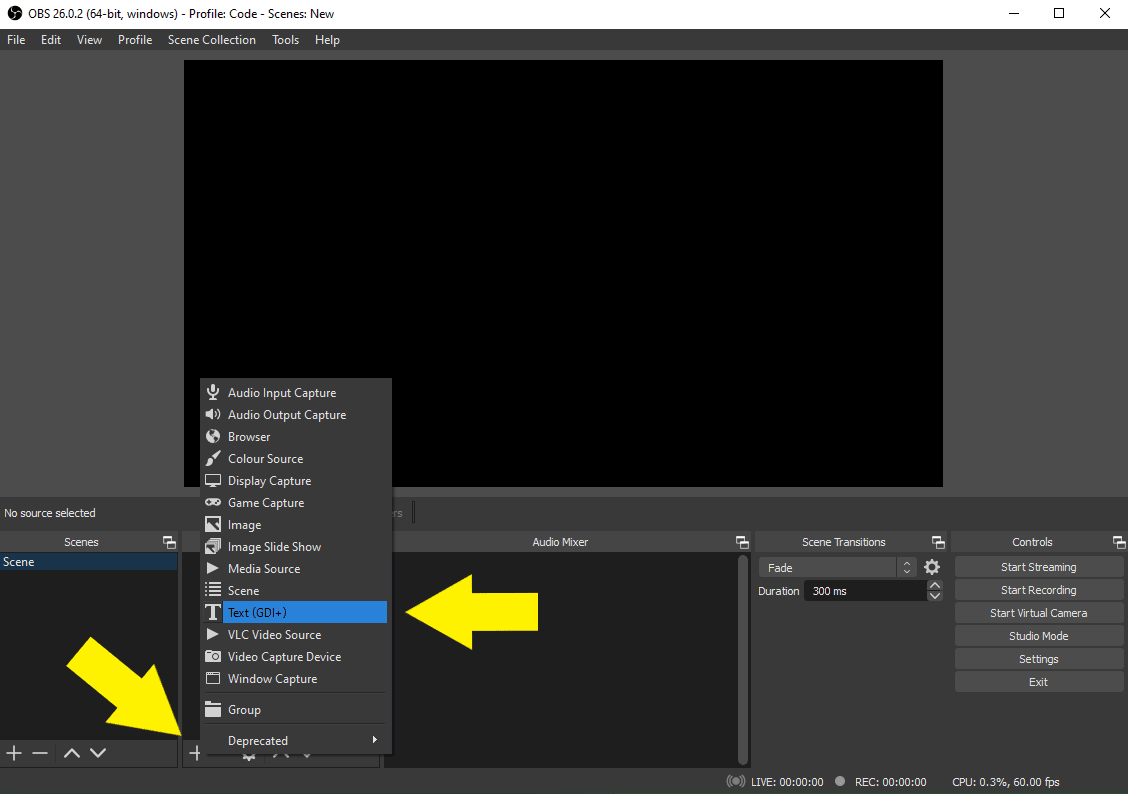
To use it you’ll need to add Text (GDI+) to the scene, in the text Create/Select Source give the text a name and select ok.
In the text properties dialogue that pops up add in some placeholder text so you’re able to identify where on the Scene the text is.
There are other options in the text properties dialogue to give the text the appearance you like.
Next up select Tools > Scripts from the OBS menu. Click on the plus button and add the script download from the OBS forum resources section.
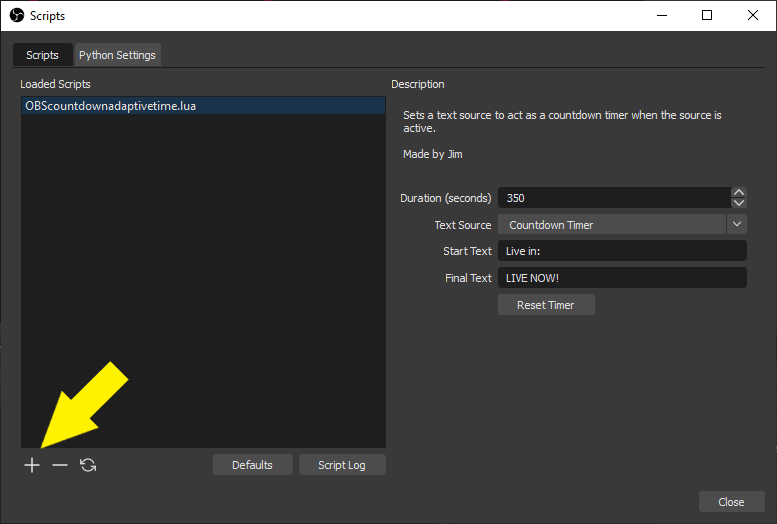
Here you can add in the duration and the start and stop text. You’ll also need to add the Text Source as the Text (GDI+) source you added, type the name you gave the text source in here.
See the video here for a walkthrough of setting it up:
Lighting
Lighting is something I didn’t worry about too much when I first started but now that the days are drawing in and there’s less natural light available a little extra light goes a long way!
The images in this tweet were taken early in the morning with no available natural light, the little USB light is angled away from my face towards the wall behind my monitor.
This little lamp is enough for me right now as that’s all I have room for really, your situation may be different.
Sound
Sound is one major factor in videos, if is sounds like crap no one wants to hang around.
OBS has some great options for this and in the latest version (26.0.2) there’s been some awesome additions.
Prior to that I had issues sometimes with background hiss on my mic and I had a noise gate filter, this would be when you spoke and you voice was over a certain level then the mic opened reducing the background noise.
With the latest OBS version there’s an option for Noise Suppression which resolved most of the issues I was having, adding a little extra gain goes a long way too.
To add filters to your mic input click on the cog nex to where the mic level is moving and select Filters fom the context menu.
From here add in the desired filters, ones I have are Noise Suppression, Compressor, Gain and Noise Gate.
They are all at the default setting except for gain which is at 10.00dB. These setting will vary with differing microphones so my setting will probably not match what result you want from your set up.
Check out the short video detailing adding filters to your mic input.
Editing
Editing, what’s that then? 😂
Seriously, time is a factor for me when recording videos, I’m super limited on the amount of time I can take. I’ve found it simpler to do a one take than spend time editing videos.
I have had comments both for and against the unedited approach, in some cases, where I’ve made a typo and it’s taken a while to realise the mistake that time is enough to turn people away from the video or compel them enough to leave a comment.
Comments are great as it’s engagement for the video that wouldn’t be there otherwise. But it’s not great to have to sit through it as a viewer.
On the odd occasion that I have used video editing it would be to remove something mid video on an otherwise useful video.
Video editing software I’d recommend that I have used personally would be OpenShot and Shotcut, both open source and cross platform.
Shotcut is my go to at the moment, it’s really handy for removing all the uhms and errs from a video.
Marketing
I can’t help you, sorry!
Marketing is something I really don’t have anything salient to share other than the usual clichés like content is king or about being authentic 🤷♀️. Not much help I know, really hand-wavy advice and something I’m not really happy about saying.
I’ll leave it there with that one!
What about YouTube tho?!!
So, if you’ve got this far then THANK YOU 🙏, I really appreciate it.
If you’re looking to start adding videos to YouTube, what do you need other than the video?
If you don’t have a Google account already set up then you will need to Create a new Google account.
If you already have a google account but want to create a new YouTube channel check out the YouTube channel switcher which gives you the option to create a new channel. You will be walked through the process of creating a new channel.
Adding a video to YouTube is straightforward enough, from your YouTube page there should be a plus icon that looks like a movie camera:
![]()
Click on this to be taken to your YouTube studio here is where you can add your beautifully crafted video for the world to see.
You’ll be prompted to add a title and a description for the thumbnail you can select a slide from the video as the thumbnail or add a custom one of your choosing.
With the revision of the age limits on YouTube there’s a section for if it’s for kids or not. I have it defaulted to “No, it’s not made for kids”.
There’s an option to add video elements I personally haven’t used this option but there is a lot of information on this in the Google support pages for this.
Last section will be for visibility, you can set this to private or public, the default is unlisted, this means that anyone with a link can view it otherwise it’s not publicly accessible. Once the video is finished uploading you can set this to public. There’s also an option to schedule the release date.
Done! Your video will be available on YouTube.
Wrap up!
That’s it that’s pretty much all the things I know. You should be able to do the following now:
- Get set up with OBS
- Use OBS to create basic scenes
- Create a countdown timer OBS scene
- Remove background noise from you mic with filters
- Add a video to YouTube via the YouTube studio.
Thanks again 👍
There's a reactions leaderboard you can check out too.
Sign up for the newsletter
Want to keep up to date with what I'm working on?
Join other developers and sign up for the newsletter.
I care about the protection of your data. Read the Privacy Policy for more info.