Windows Terminal Config - Make it Your Own
I’ve been using the Windows Terminal now since the summer, it’s great and I now prefer it over Hyper which was my preferred terminal.
Windows Terminal comes with a lot of options for configuration and a load more which I’ve only just discovered after researching this post!
Dope!
ℹ If you know me then you’ll know I love a shortcut key combo, I’ll be peppering this post with all the keyboard shortcuts so you can be as productive as possible when using the Windows Terminal.
Tl;Dr
If you prefer to watch how this is done then skip all the way to the end for a video detailing the process. 🚀
First impressions
When I first opened the app I was greeted with PowerShell as the initial tab, there’s a dropdown menu to choose from one of PowerShell, (default), Command Prompt or Azure Cloud Shell.
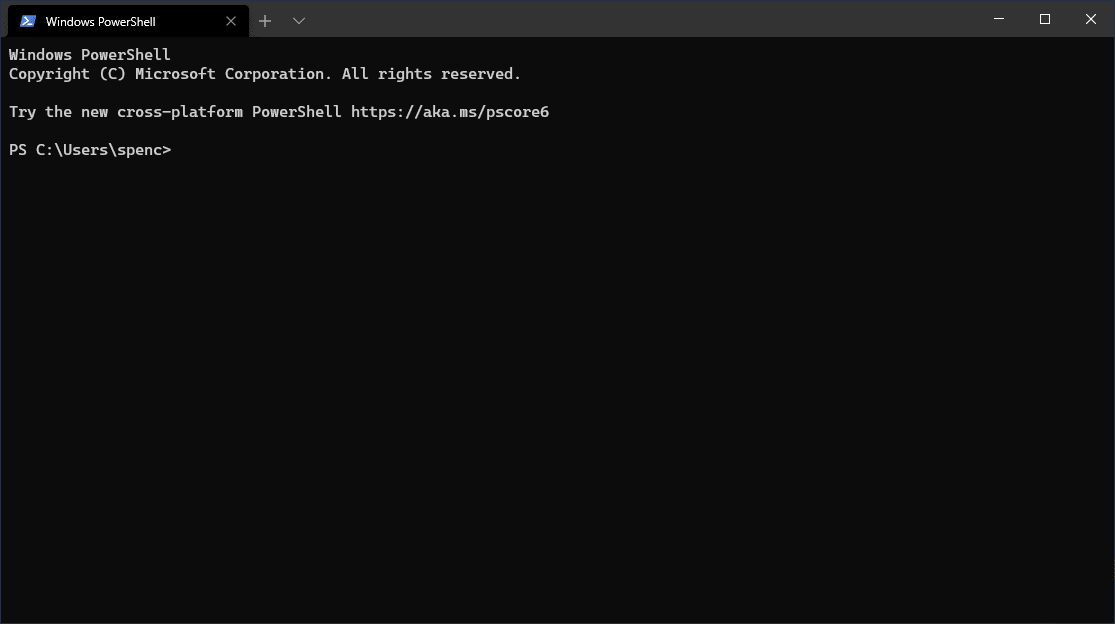
So it looks like the standard Command Prompt (sort of), I went about finding if I could change that and was pleasantly surprised.
The Windows Terminal team have done an awesome job of documenting all aspects of the Terminal.
More on that in the next section!
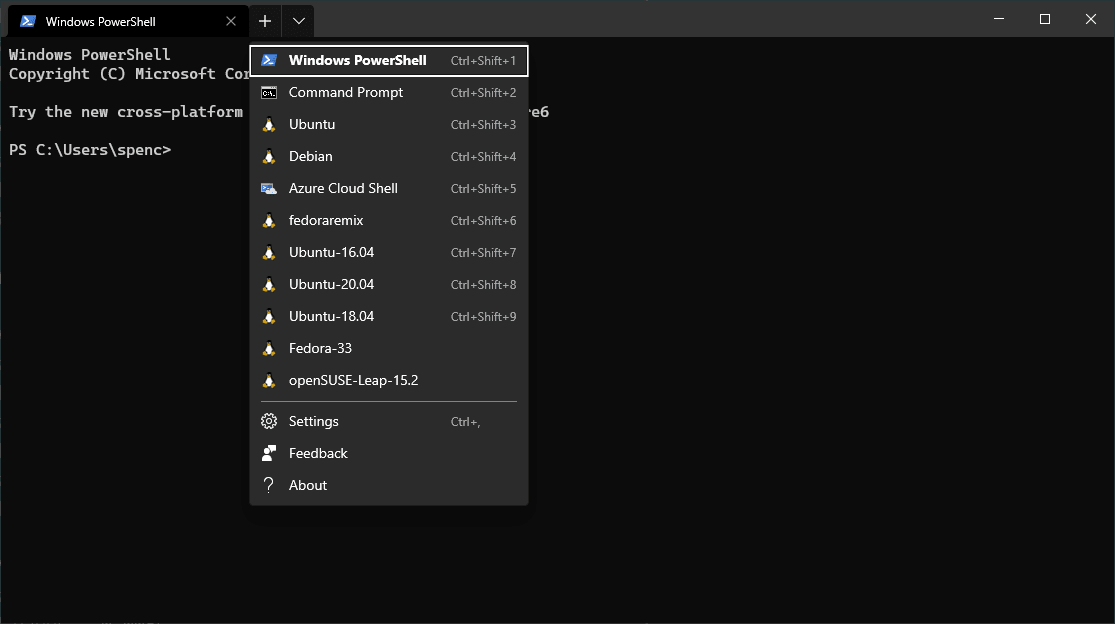
ℹ To see what available shells you have you can use Ctrl+Shift+Space Bar which will activate the dropdown which will show all available shells.
Included Themes
The first thing I did was try work out how to change the theme (priorities! 😂) and it wasn’t as simple as adding a string to a plugins array like with Hyper term.
The Windows Terminal has a settings.json file to manage the
configuration with a lot of options! I’ll come onto this in a
moment, for now I’ll say it’s split into several sections:
- Profiles
- Schemes
- Keybindings
Anyway back to the theme, important stuff right! So there are seven included colour schemes (themes) that come with the Windows Terminal:
To change to any of those I have to open the settings.json with
Ctrl+, then I’m presented with the big boi config, I want to apply the
theme Tango Dark to every tab that I open in the terminal so I’ll add
it in the profiles object:
"profiles": {
  "defaults": {
    // Put settings here that you want to apply to all profiles.
    "colorScheme": "Tango Dark"
  },
}
Other config options
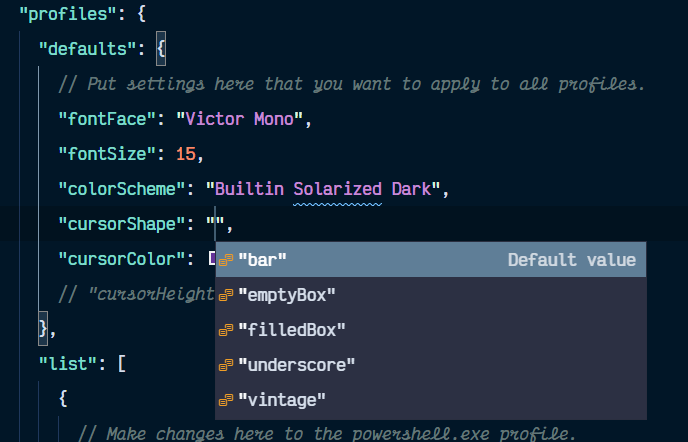
There’s also some other config options I like to set for the defaults, these are the font, font size and the cursor shape and colour:
"profiles": {
  "defaults": {
    // Put settings here that you want to apply to all profiles.
    "fontFace": "Victor Mono",
    "fontSize": 15,
    "colorScheme": "Tango Dark",
    "cursorShape": "filledBox",
    "cursorColor": "#639"
    // "cursorHeight": 85 // use with vintage cursorShape
  }
}
ℹ I discovered the additional cursor options by hitting Ctrl+space bar to bring up the intellisense options:
Use your own Theme
You may have noticed in the last image there that the theme isn’t one of the provided themes.
I wasn’t happy with the provided theming options so went to find a custom one to use, luckily for me there’s Windows Terminal Themes which is a a very large selection of pre made themes.
If you’re tired of looking through the themes on the website you can
check out the Windows Terminal Themes GitHub themes.json file (it’s a chonka!).
You can create your own theme in the Windows Terminal but I went for
one of the ones available on the Windows Terminal Themes site Builtin Solarized Dark.
The way to use it is, copy the theme object from the site and paste it
into the schemes array part of the settings.json file.
In it’s initial state the schemes array is empty:
// Add custom color schemes to this array.
// To learn more about color schemes, visit https://aka.ms/terminal-color-schemes
"schemes": [],
I add the theme object to the schemes array then I need to set it
for the default, which means any tab I open for Ubuntu, Debian etc
will have the same theme.
The schemes array with the new theme in there:
// Add custom color schemes to this array.
// To learn more about color schemes, visit https://aka.ms/terminal-color-schemes
"schemes": [
  {
    "name": "Builtin Solarized Dark",
    "black": "#073642",
    "red": "#dc322f",
    "green": "#859900",
    "yellow": "#b58900",
    "blue": "#268bd2",
    "purple": "#d33682",
    "cyan": "#2aa198",
    "white": "#eee8d5",
    "brightBlack": "#002b36",
    "brightRed": "#cb4b16",
    "brightGreen": "#586e75",
    "brightYellow": "#657b83",
    "brightBlue": "#839496",
    "brightPurple": "#6c71c4",
    "brightCyan": "#93a1a1",
    "brightWhite": "#fdf6e3",
    "background": "#002b36",
    "foreground": "#839496"
  }
]
Then in profiles, defaults section I add in the colour scheme:
"profiles": {
  "defaults": {
    // Put settings here that you want to apply to all profiles.
    "fontFace": "Victor Mono",
    "fontSize": 15,
    "colorScheme": "Builtin Solarized Dark",
    "cursorShape": "filledBox",
    "cursorColor": "#639"
    // "cursorHeight": 85 // use with vintage cursorShape
  }
}
Bingo bango, new theme for all my new terminal tabs I open!
Profiles
So I can have a nice theme for the terminal now, nice font, yay! What now if I want to have a different theme for when I’m in Ubuntu and Debian? (I use a lot of Windows Subsystem for Linux instances)
In the profiles section of the settings.json I have a profile for
each shell available to me on my machine.
These are autogenerated each time I add in a WSL instance but the
default ones are for PowerShell, Command Prompt and Azure Cloud Shell,
as I don’t use any of these in the terminal I’m going to set their hidden value to true:
"list": [
  {
    // Make changes here to the powershell.exe profile.
    "guid": "{61c54bbd-c2c6-5271-96e7-009a87ff44bf}",
    "name": "Windows PowerShell",
    "commandline": "powershell.exe",
    "hidden": true
  },
  {
    // Make changes here to the cmd.exe profile.
    "guid": "{0caa0dad-35be-5f56-a8ff-afceeeaa6101}",
    "name": "Command Prompt",
    "commandline": "cmd.exe",
    "hidden": true
  },
  {
    "guid": "{b453ae62-4e3d-5e58-b989-0a998ec441b8}",
    "name": "Azure Cloud Shell",
    "source": "Windows.Terminal.Azure",
    "hidden": true
  },
]
Notice the guid that’s to identify the profile, and because I’ve
hidden the current default one of PowerShell I’m going to update that
so it opens in Ubuntu 20.04 each time, right at the top of the
settings file is where I can set the default profile to use:
{
  "$schema": "https://aka.ms/terminal-profiles-schema",
  "defaultProfile": "{07b52e3e-de2c-5db4-bd2d-ba144ed6c273}",
These default options on a profile can be extended, so when I pick a
Debian shell I can have the colorScheme set to Campbell PowerShell:
{
  "guid": "{58ad8b0c-3ef8-5f4d-bc6f-13e4c00f2530}",
  "hidden": false,
  "name": "Debian",
  "source": "Windows.Terminal.WSL",
  "colorScheme": "Campbell PowerShell"
}
Sweet!
Now popping open a Debian shell gives me that colour scheme!
It doesn’t stop there I can change the font size and font family as well if I want:
{
  "guid": "{58ad8b0c-3ef8-5f4d-bc6f-13e4c00f2530}",
  "hidden": false,
  "name": "Debian",
  "source": "Windows.Terminal.WSL",
  "fontSize": 8,
  "fontFace": "Comic Sans MS",
  "colorScheme": "Campbell PowerShell"
}
Maybe don’t use that font though! 😁
Background images
There’s an option to add background images to the terminal pane too!
For my use case I’ve added an Ubuntu image to the bottom of my Ubuntu instances and a Debian one to my Debian instance.
To add a background image I’ll first need to add the image to where the terminal can access it.
If you ever find reference to ms-appdata:///roaming for Windows
Terminal, that’s translated into:
%LOCALAPPDATA%PackagesMicrosoft.WindowsTerminal_8wekyb3d8bbweRoamingStateI’ll use that location by copy pasting that into the run prompt (Windows key+r) of Windows and it opens the folder location.
In here is where I can add .png, .jpg and even .gif files!!
I tried .svg which doesn’t work.
Now I have some images available for the shell to access I can add them to the individual profiles for Debian and Ubuntu.
Here’s how it looks for Ubuntu:
{
  "guid": "{07b52e3e-de2c-5db4-bd2d-ba144ed6c273}",
  "hidden": false,
  "name": "Ubuntu-20.04",
  "source": "Windows.Terminal.WSL",
  "backgroundImage": "ms-appdata:///roaming/ubuntu.png",
  "backgroundImageStretchMode": "none",
  "backgroundImageAlignment": "bottomRight",
  "backgroundImageOpacity": 0.5
},
There’s other options that are available, play around with them to get the desired effect, I’ve listed them here:
"backgroundImageStretchMode": "fill",
"backgroundImageStretchMode": "none",
"backgroundImageStretchMode": "uniform",
"backgroundImageStretchMode": "uniformToFill",

"backgroundImageAlignment": "bottom",
"backgroundImageAlignment": "bottomLeft",
"backgroundImageAlignment": "bottomRight",
"backgroundImageAlignment": "center",
"backgroundImageAlignment": "left",
"backgroundImageAlignment": "right",
"backgroundImageAlignment": "top",
"backgroundImageAlignment": "topLeft",
"backgroundImageAlignment": "topRight",
Schemes
I’ve already covered schemes in theming, this is where I can dump
all the themes I want to use for all the different profiles I can
create in the profiles object!🔥
Currently in my settings.json this only holds the theme I pulled
form Windows Terminal Themes but I could add all the themes from
there here if I wanted, I’m happy with the one theme for now.
Keybindings
ℹ just to note that in the Windows Terminal Preview keybindings is
replaced by actions.
Like I said at the top of this post I’m a massive keyboard shortcuts user so this section is for all the things I want to do with a couple of key strokes!
I’ll list out some of the default ones here:
- Copy paste is set to: Ctrl+Shift+c and Ctrl+Shift+v respectively.
- Find: Ctrl+Shift+f
- Close open pane/tab: Ctrl+Shift+w
Now, for some shortcut keybindings I’ve added myself:
- Split current pane: Ctrl+Alt+a
- Duplicate current tab: Ctrl+Shift+d
- Bump up font size: Ctrl+=
- Bump down font size: Ctrl+-
- Reset font size: Ctrl+0
- Switch to next tab: Ctrl+page down
- Switch to previous tab: Ctrl+pageup
These all go in the keybindings/actions section of the settings.json file, here’s how mine looks:
({
  "command": {
    "action": "splitPane",
    "split": "auto",
    "splitMode": "duplicate"
  },
  "keys": "ctrl+alt+a"
},
{ "command": "duplicateTab", "keys": "ctrl+shift+d" },
{
  "command": { "action": "adjustFontSize", "delta": 1 },
  "keys": "ctrl+="
},
{
  "command": { "action": "adjustFontSize", "delta": -1 },
  "keys": "ctrl+-"
},
{ "command": "resetFontSize", "keys": "ctrl+0" },
{ "command": "nextTab", "keys": "ctrl+pagedown" },
{ "command": "prevTab", "keys": "ctrl+pageup" })
Video detailing the process
As with most of my posts now I’ve added a video detailing the process…
That is for this one
One thing to watch out for is the Windows Terminal Preview which has all the latest features available on it which I’m going to switch to once I have finished writing this post!
Resources
Like I mentioned earlier the Microsoft docs are great there’s a ton of stuff available there I’ll also be keeping up to date on the Windows Command Line Blog.
There's a reactions leaderboard you can check out too.
Sign up for the newsletter
Want to keep up to date with what I'm working on?
Join other developers and sign up for the newsletter.
I care about the protection of your data. Read the Privacy Policy for more info.